> ## Documentation Index
> Fetch the complete documentation index at: https://draft-1bdd2994.mintlify.site/llms.txt
> Use this file to discover all available pages before exploring further.
# uDev
> This part of the documentation will explain how to use uxento's uDev feature.
 ***uxento also gives you the power the to be the dev, simpler than ever, with uDev.***
## Fees:
1.25% + Launchpad (Pumpfun/Bonkfun/Heaven/BagsApp) Fee = **Creation**
0.75% + Launchpad (Pumpfun/Bonkfun/Heaven/BagsApp) Fee = **Buy/Sell**
## How to Set Up uDev:
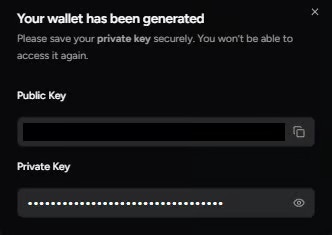
To set up uDev, firstly you must create a uDev account by registering with [Google, Discord or an alternative email provider](/uxento-vision#how-to-access-uxento-vision%3A). Once you have completed registering via your preferred gateway, uDev will generate a developer wallet and a private key.
**Please ensure to save your private key securely as you won't be able to access it again.**
In order to launch coins via uDev, you will need to load this wallet with a small amount of SOL to cover necessary dev fees.
*The minimum recommended amount is 0.1 SOL, which will cover both fees and allow you to buy a small allocation of your coin.*
[You can also manage and import your own wallets into uDev, to learn how to do so click here.](/uDev#manage-developer-wallets-in-udev%3A)
***uxento also gives you the power the to be the dev, simpler than ever, with uDev.***
## Fees:
1.25% + Launchpad (Pumpfun/Bonkfun/Heaven/BagsApp) Fee = **Creation**
0.75% + Launchpad (Pumpfun/Bonkfun/Heaven/BagsApp) Fee = **Buy/Sell**
## How to Set Up uDev:
To set up uDev, firstly you must create a uDev account by registering with [Google, Discord or an alternative email provider](/uxento-vision#how-to-access-uxento-vision%3A). Once you have completed registering via your preferred gateway, uDev will generate a developer wallet and a private key.
**Please ensure to save your private key securely as you won't be able to access it again.**
In order to launch coins via uDev, you will need to load this wallet with a small amount of SOL to cover necessary dev fees.
*The minimum recommended amount is 0.1 SOL, which will cover both fees and allow you to buy a small allocation of your coin.*
[You can also manage and import your own wallets into uDev, to learn how to do so click here.](/uDev#manage-developer-wallets-in-udev%3A)
 uDev will also automatically create a user profile for you which will retain your preferred settings, you can edit your profile anytime via Dev Settings.
After you have authenticated with Discord, you will see a Rocket button appear in the top right of your Uxento Vision page. Click this to turn on Dev Mode.
uDev will also automatically create a user profile for you which will retain your preferred settings, you can edit your profile anytime via Dev Settings.
After you have authenticated with Discord, you will see a Rocket button appear in the top right of your Uxento Vision page. Click this to turn on Dev Mode.
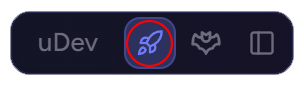 With Dev Mode enabled, you can instantly launch coins via the tracker cards within your Uxento Vision feed.
## How to Launch Coins with uDev:
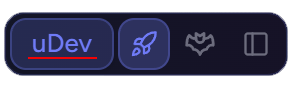
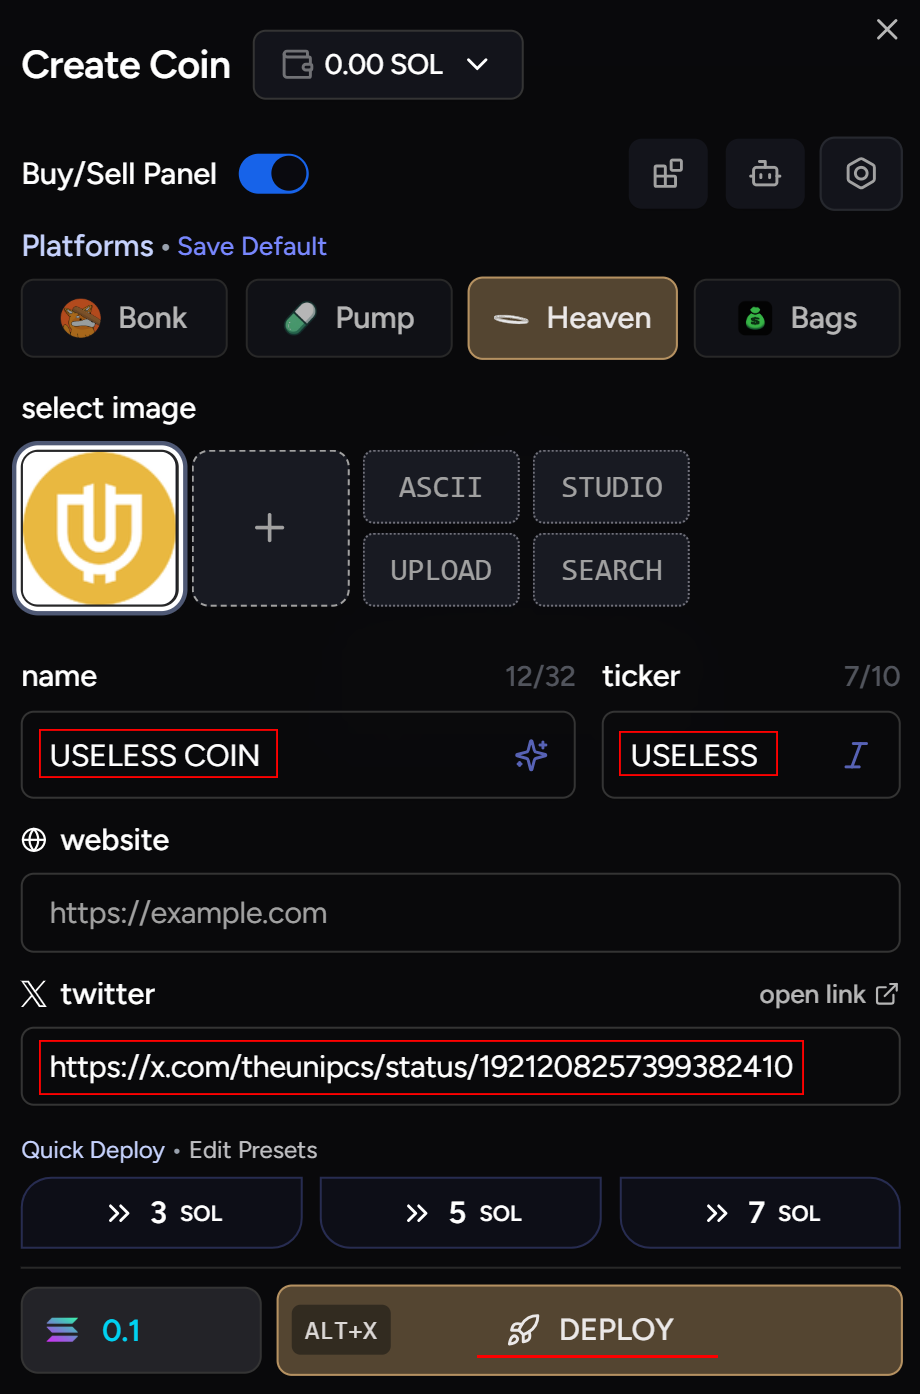
To launch a coin with uDev, simply click the uDev button to be taken to the launcher which will allow you to customize your coin.
With Dev Mode enabled, you can instantly launch coins via the tracker cards within your Uxento Vision feed.
## How to Launch Coins with uDev:
To launch a coin with uDev, simply click the uDev button to be taken to the launcher which will allow you to customize your coin.
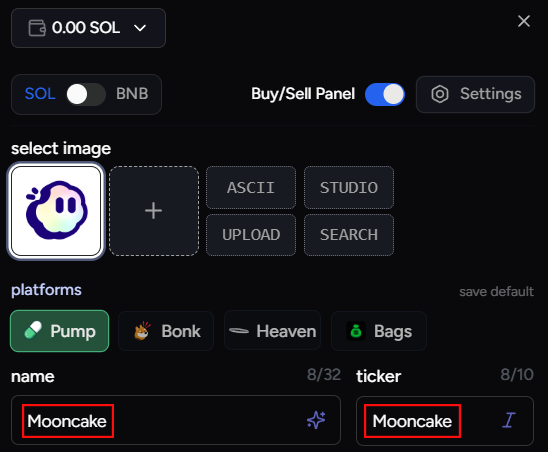
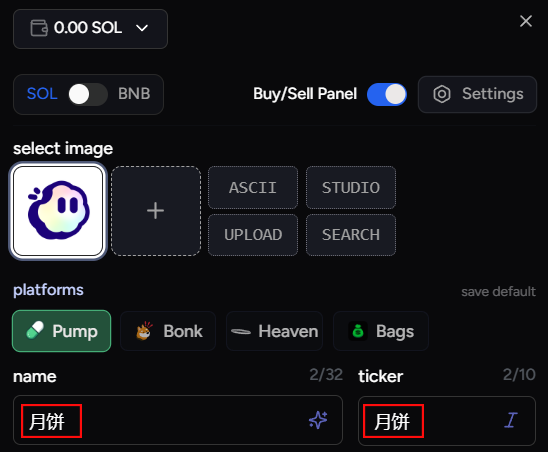
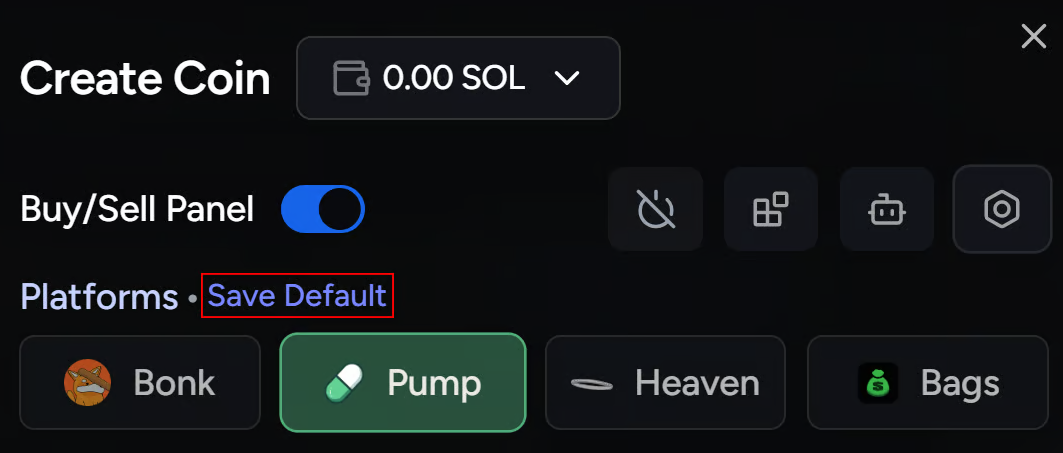
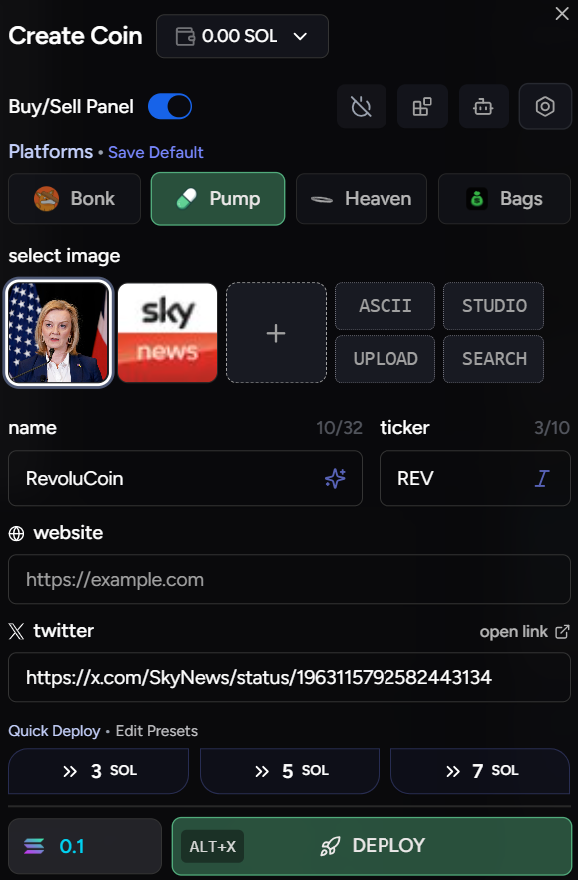
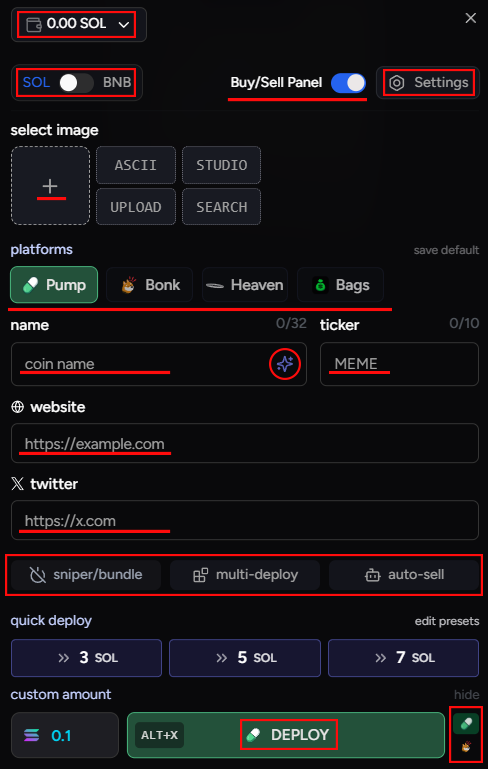 Within the launch panel, you will be able to customize your coin's name, ticker, images, links and choose whether to launch on your coin on Bonk, Pump, BagsApp or Heaven *(you can also click 'Save Default Platform' to ensure that your preferred platform will always be the default selected platform when launching.)*
You may hide specific fields in the uDev panel by clicking the Hide option on any available fields.
Within the launch panel, you will be able to customize your coin's name, ticker, images, links and choose whether to launch on your coin on Bonk, Pump, BagsApp or Heaven *(you can also click 'Save Default Platform' to ensure that your preferred platform will always be the default selected platform when launching.)*
You may hide specific fields in the uDev panel by clicking the Hide option on any available fields.
 [You may also use uDev to launch on BNB by clicking on the SOL/BNB toggle in the top left of the uDev Creator Module. To learn more click here.](/uDev#launch-coins-with-fourmeme%3A)
Social links will be auto-populated using the corresponding tweet, but can also be changed within the panel. You can also click the Star Icon to auto-generate a coin name and ticker - don't like the name/ticker? Just click it again to re-generate it.
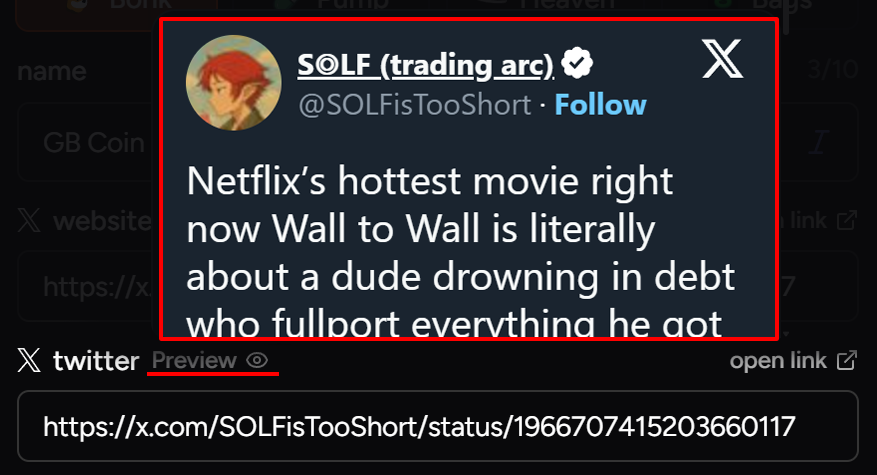
If the twitter link field is populated with a valid link, a Preview button will appear allowing you to actively preview the attached tweet.
[You may also use uDev to launch on BNB by clicking on the SOL/BNB toggle in the top left of the uDev Creator Module. To learn more click here.](/uDev#launch-coins-with-fourmeme%3A)
Social links will be auto-populated using the corresponding tweet, but can also be changed within the panel. You can also click the Star Icon to auto-generate a coin name and ticker - don't like the name/ticker? Just click it again to re-generate it.
If the twitter link field is populated with a valid link, a Preview button will appear allowing you to actively preview the attached tweet.
 Simply fill out the fields, input the amount of \$SOL you wish to buy (or use one of the handy, editable presets) and click 'Create Coin' to launch your coin; uDev will then create your coin. [You can also launch coins via your Trading Platform, click here to learn how.](/uDev#launch-coins-via-your-trading-platform%3A)
 uDev's custom API boasts speeds under 100ms - making launching with uDev faster than any other platform - by far.
As uxento continues to build, improve and update uDev - there may be a number of changes to the UI.
## How To Change Images in uDev:
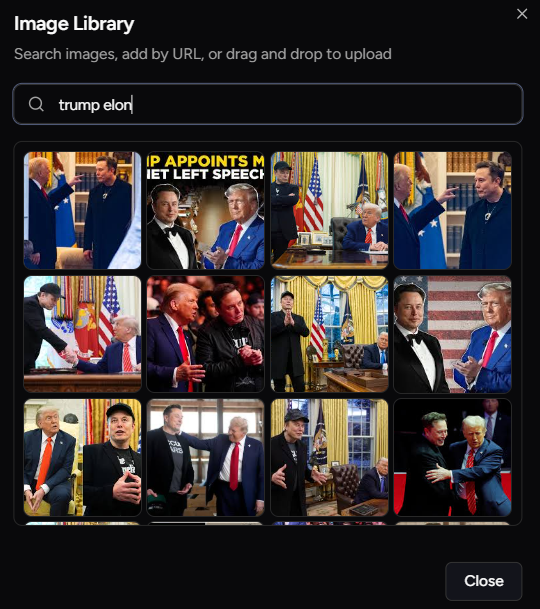
While Images are automatically uploaded to uDev's launcher, you can also upload your own image by dragging and dropping your image to the plus, or clicking on the plus button.
When you click on the plus button, you will have to option to find images using the search bar, by inputting a URL or dragging and dropping an image into the field. You can also resize or crop your image by double clicking it when in the Launch Panel.
uDev's custom API boasts speeds under 100ms - making launching with uDev faster than any other platform - by far.
As uxento continues to build, improve and update uDev - there may be a number of changes to the UI.
## How To Change Images in uDev:
While Images are automatically uploaded to uDev's launcher, you can also upload your own image by dragging and dropping your image to the plus, or clicking on the plus button.
When you click on the plus button, you will have to option to find images using the search bar, by inputting a URL or dragging and dropping an image into the field. You can also resize or crop your image by double clicking it when in the Launch Panel.
 #### ASCII Art Generator:
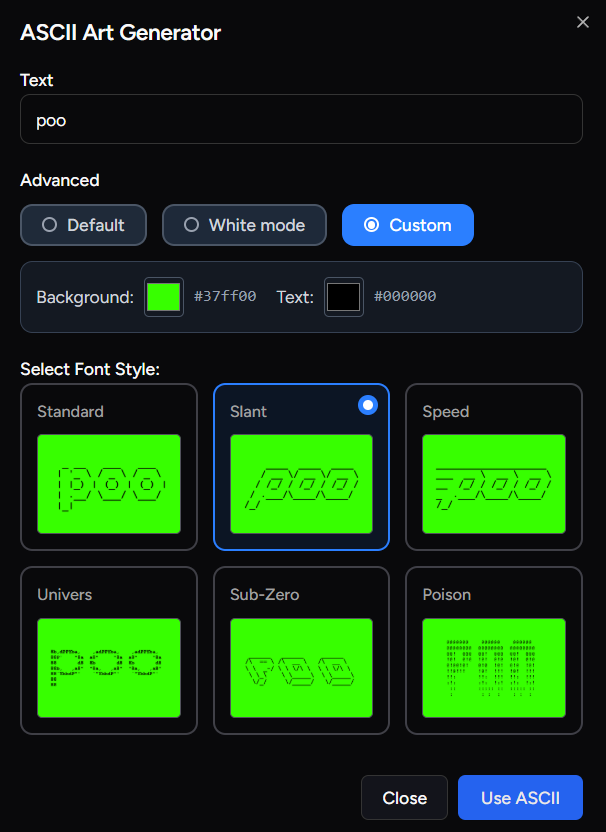
Additionally, you may also use the custom ASCII Art Generator within the uDev Launch Panel to easily create ASCII Art for your coin. Simply click the ASCII button next to the Image Library in your uDev Launch Panel.
#### ASCII Art Generator:
Additionally, you may also use the custom ASCII Art Generator within the uDev Launch Panel to easily create ASCII Art for your coin. Simply click the ASCII button next to the Image Library in your uDev Launch Panel.
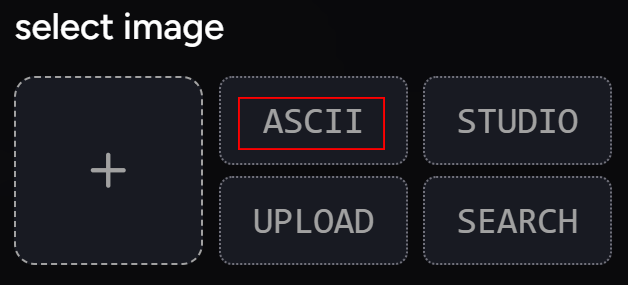 Clicking the ASCII button will take you to the ASCII Art Generator panel where you may enter your desired text and select one of eight ASCII style fonts as well as customize the background and text color.
 You may also [Quick Deploy](/udev#quick-deploy%3A) with ASCII art. Simply highlight text on any page and click on 'ASCII'.
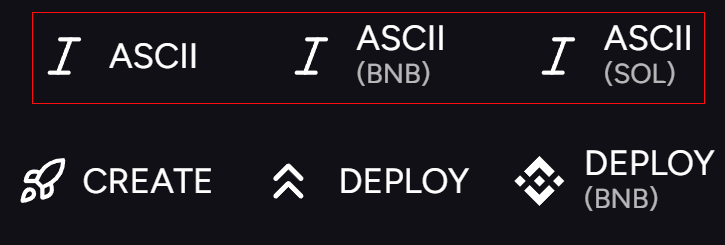 You may click on ASCII (SOL) or ASCII (BNB) to quick-deploy your coin with ASCII art in a SOL/BNB color scheme
#### uDev Studio:
You may also create entirely custom artwork for your coins within the uDev Launch Panel using uDev Studio. Simply click the Studio button next to the Image Library in your Launcher.
You may click on ASCII (SOL) or ASCII (BNB) to quick-deploy your coin with ASCII art in a SOL/BNB color scheme
#### uDev Studio:
You may also create entirely custom artwork for your coins within the uDev Launch Panel using uDev Studio. Simply click the Studio button next to the Image Library in your Launcher.
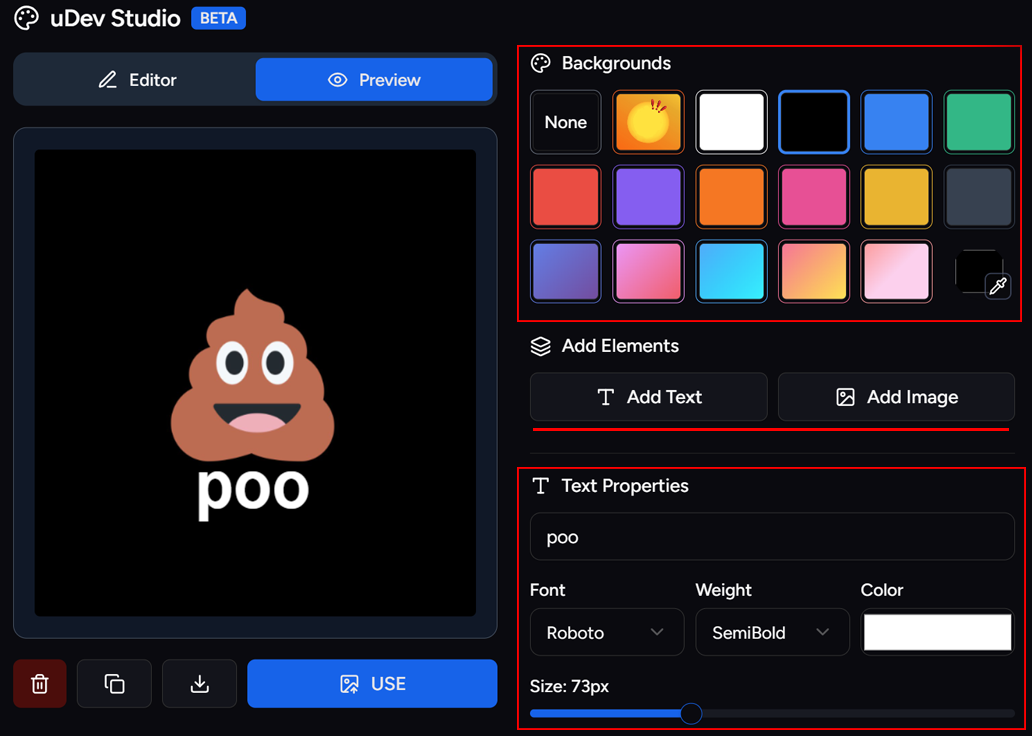
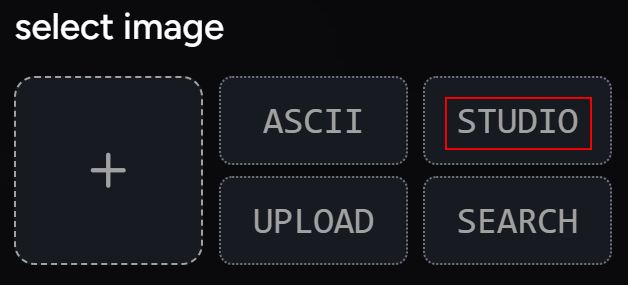 Clicking the Studio button will bring you to uDev Studio, a fully customizable, easy design editor to create images for your coins.
Pick from the pre-selected gradient backgrounds or choose a custom background from the color picker, and then customize further by adding text and/or custom images. Once complete, click the Use button to finalize.
Clicking the Studio button will bring you to uDev Studio, a fully customizable, easy design editor to create images for your coins.
Pick from the pre-selected gradient backgrounds or choose a custom background from the color picker, and then customize further by adding text and/or custom images. Once complete, click the Use button to finalize.
 ## Custom Vanity CA:
Within the uDev Creator Module, you also have the ability to launch tokens with a Custom ‘Bonk’ or ‘Pump’ Vanity CA; whether you're launching on Pump/Bonk or any other launchpad. Simply click the Pump/Bonk icons at the bottom-right of the creator module, located next to the Deploy button.
## Custom Vanity CA:
Within the uDev Creator Module, you also have the ability to launch tokens with a Custom ‘Bonk’ or ‘Pump’ Vanity CA; whether you're launching on Pump/Bonk or any other launchpad. Simply click the Pump/Bonk icons at the bottom-right of the creator module, located next to the Deploy button.
 ## Vamp Coin:
uDev also allows you to easily 'Vamp' coins and create tokens based on another coin's contract address, instantly. This allows you to easily PvP other emerging coins in real time.
## Vamp Coin:
uDev also allows you to easily 'Vamp' coins and create tokens based on another coin's contract address, instantly. This allows you to easily PvP other emerging coins in real time.
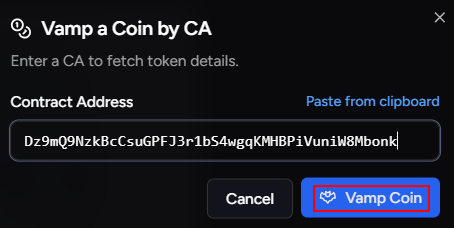
 To do this, simply click the Coins icon, next to the Dev mode button, this will bring up a pop-up asking for the contract address of the coin you wish to vamp. Simply import the CA and uDev will retrieve all necessary information to launch so that only remaining thing you need to do is click Create Coin.
[You can also Vamp Coins via your trading platform, click here to learn how.](/uDev#launch-coins-via-your-trading-platform%3A)
To do this, simply click the Coins icon, next to the Dev mode button, this will bring up a pop-up asking for the contract address of the coin you wish to vamp. Simply import the CA and uDev will retrieve all necessary information to launch so that only remaining thing you need to do is click Create Coin.
[You can also Vamp Coins via your trading platform, click here to learn how.](/uDev#launch-coins-via-your-trading-platform%3A)
 **Vamp Mode:**
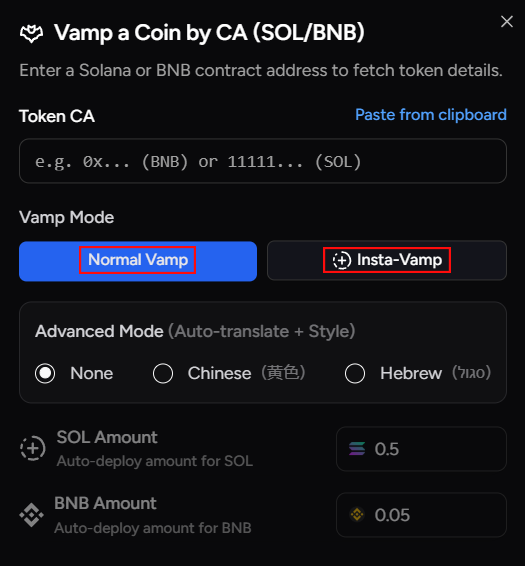
You may toggle your Vamp Coin creation mode between Normal Vamp and Insta-Vamp.
When Insta-Vamp is enabled, uDev will instantly **Quick Deploy** coins when any CA is entered via your preferred launch platform using the designated Insta-Vamp Amount.
**Vamp Mode:**
You may toggle your Vamp Coin creation mode between Normal Vamp and Insta-Vamp.
When Insta-Vamp is enabled, uDev will instantly **Quick Deploy** coins when any CA is entered via your preferred launch platform using the designated Insta-Vamp Amount.
 **Vamp Mode (Chinese/Hebrew):**
uDev allows you to Vamp Coins in both Chinese and Hebrew.
**Vamp Mode (Chinese/Hebrew):**
uDev allows you to Vamp Coins in both Chinese and Hebrew.
 Simply select which style you require under the Advanced Settings in Vamp Mode and then paste a CA.
uDev will automatically translate the token into Chinese/Hebrew.
## Quick Deploy:
The quickest and most efficient means of launching if you want to capitalize on trending memes/news is uDev's Quick Deploy feature. Quick Deploying can be done by highlighting any text from a tweet on your Uxento Vision and clicking **'Deploy'**. This will instantly launch a coin based on the highlighted text.
Quick Deploy can also be used to launch tokens to the BNB chain via FourMeme. Simply highlight any text and click **'Deploy (BNB)'** instead of Deploy.
Simply select which style you require under the Advanced Settings in Vamp Mode and then paste a CA.
uDev will automatically translate the token into Chinese/Hebrew.
## Quick Deploy:
The quickest and most efficient means of launching if you want to capitalize on trending memes/news is uDev's Quick Deploy feature. Quick Deploying can be done by highlighting any text from a tweet on your Uxento Vision and clicking **'Deploy'**. This will instantly launch a coin based on the highlighted text.
Quick Deploy can also be used to launch tokens to the BNB chain via FourMeme. Simply highlight any text and click **'Deploy (BNB)'** instead of Deploy.
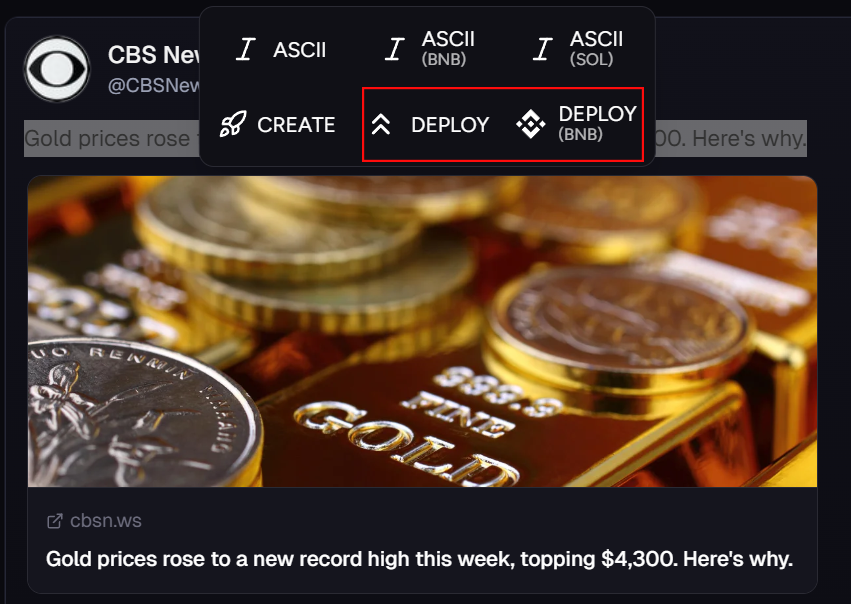 You can further customize your Quick Deploy settings via the Advanced Settings button in the uDev Launcher. Just navigate to the Quick Deploy section and customize the SOL amount you wish to quick launch with.
 ## Launch Coins with BagsApp:
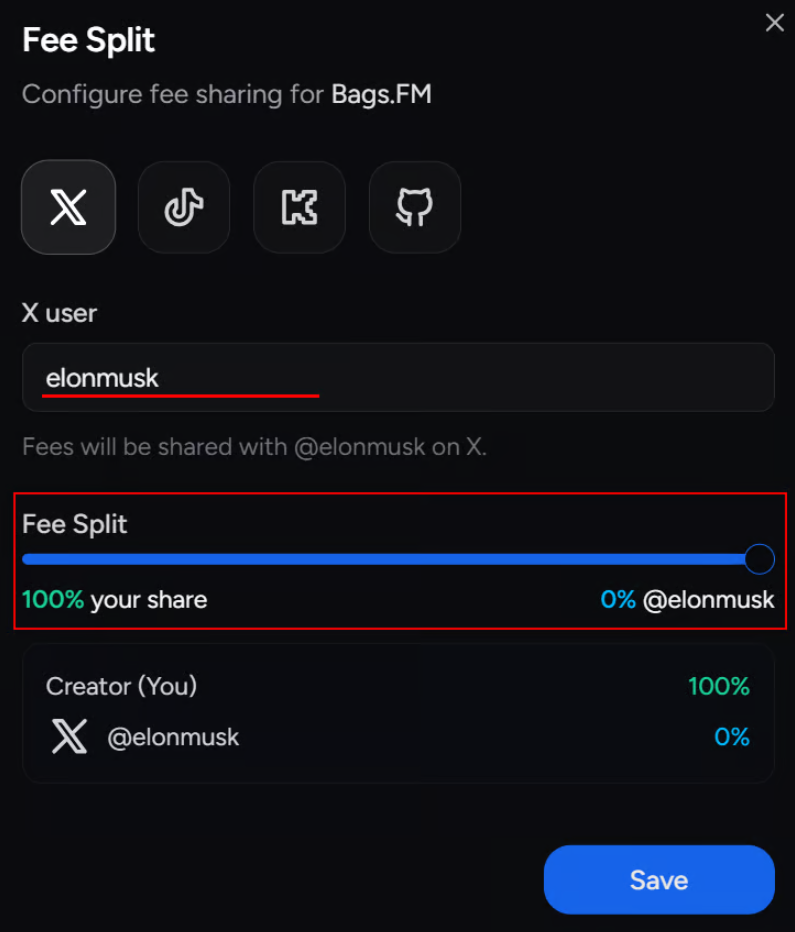
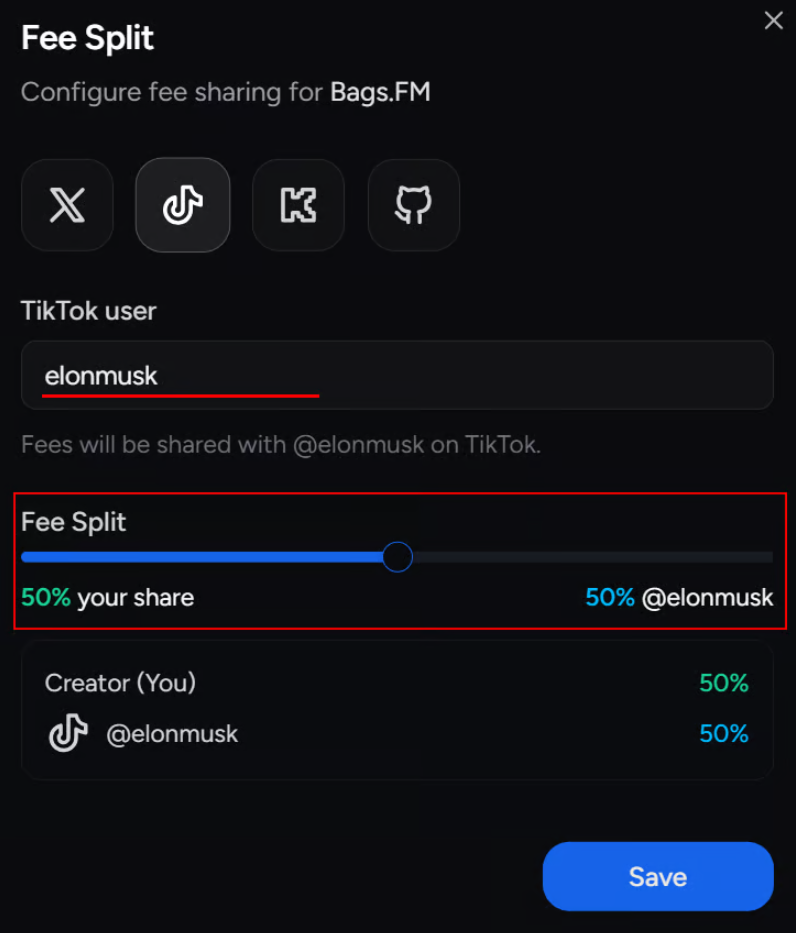
uDev is also currently the only development platform that supports deployment via BagsApp; you do not need to do anything to connect uDev with BagsApp and will already be able to see it as an option when launching with uDev. You may also customize your developer fees when launching via BagsApp, to do this simply click Customize Bags Fees, input the Twitter Username you wish to share royalties with, and move the slider to your desired Fee Split.
## Launch Coins with BagsApp:
uDev is also currently the only development platform that supports deployment via BagsApp; you do not need to do anything to connect uDev with BagsApp and will already be able to see it as an option when launching with uDev. You may also customize your developer fees when launching via BagsApp, to do this simply click Customize Bags Fees, input the Twitter Username you wish to share royalties with, and move the slider to your desired Fee Split.
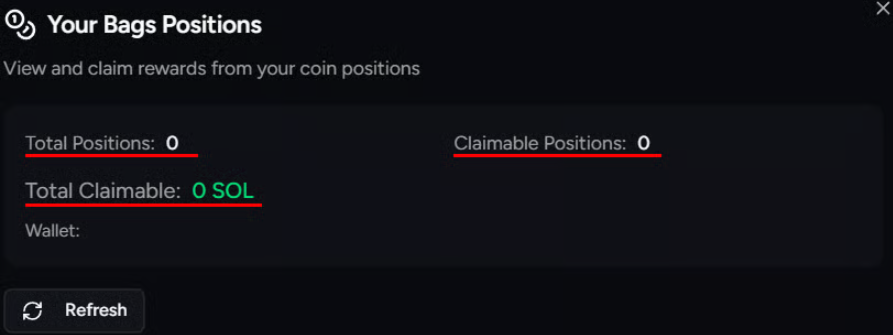
 You can also view your active positions and claim SOL rewards from your BagsApp tokens. To do this, simply navigate to the External Connections pane under the Dev Mode settings menu and click View Positions. This will bring up any current tokens you have created, or are holding in your BagsApp connected Developer Wallet.
## Launch Coins with FourMeme:
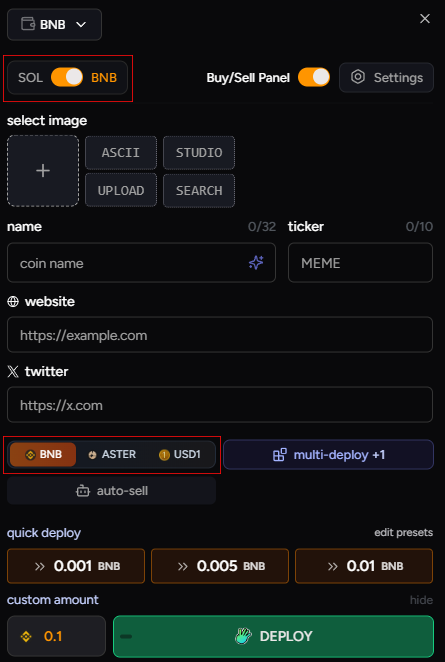
uDev also supports the deployment of tokens to the BNB chain via FourMeme. To do this, simply click the SOL/BNB toggle in the top left of the uDev Creator Module to configure BNB launches.
Simply fill in the fields and launch your coin on BNB as you would on any SOL launchpad via uDev.
Launches via FourMeme can be supported by BNB, Aster or USD1 and allow uDev features such as [multi/cross-deploy](/udev#multi-deploy-tokens%3A) and [auto-sell](/udev#auto-sell%3A).
[To exchange seemlessly between SOL/BNB you can use Uxento Bridge.](/bridge)
You can also view your active positions and claim SOL rewards from your BagsApp tokens. To do this, simply navigate to the External Connections pane under the Dev Mode settings menu and click View Positions. This will bring up any current tokens you have created, or are holding in your BagsApp connected Developer Wallet.
## Launch Coins with FourMeme:
uDev also supports the deployment of tokens to the BNB chain via FourMeme. To do this, simply click the SOL/BNB toggle in the top left of the uDev Creator Module to configure BNB launches.
Simply fill in the fields and launch your coin on BNB as you would on any SOL launchpad via uDev.
Launches via FourMeme can be supported by BNB, Aster or USD1 and allow uDev features such as [multi/cross-deploy](/udev#multi-deploy-tokens%3A) and [auto-sell](/udev#auto-sell%3A).
[To exchange seemlessly between SOL/BNB you can use Uxento Bridge.](/bridge)
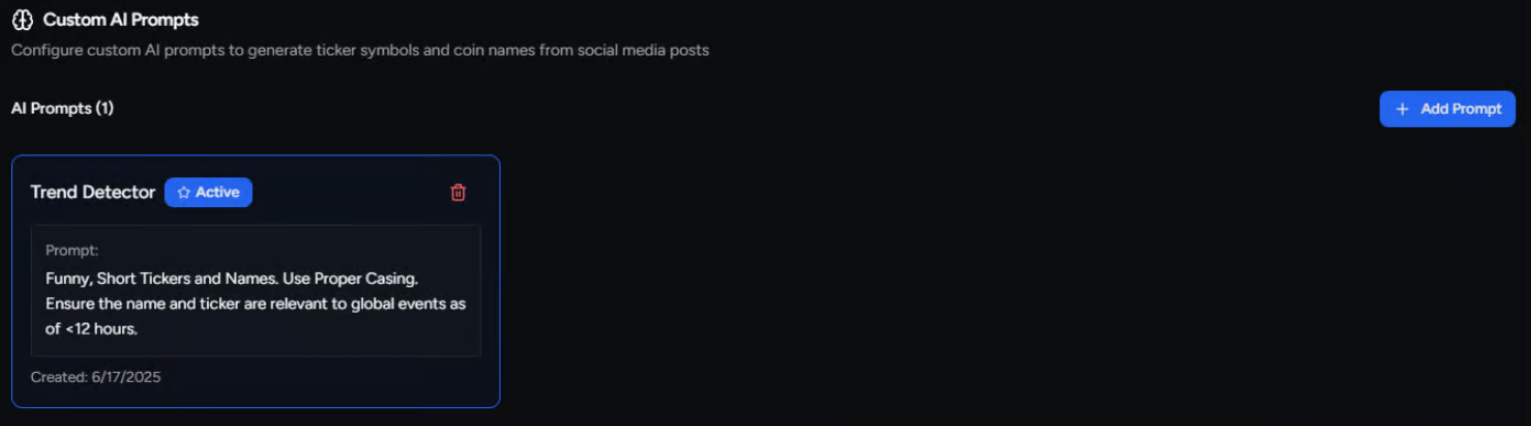
 ## Custom AI Prompts:
To make using uDev even easier, you can set-up AI Prompts to assist in the creation of your coin's ticker/coin names. These prompts work via the [Star icon](/uDev#how-to-launch-coins-with-udev%3A) in the uDev Launch panel.
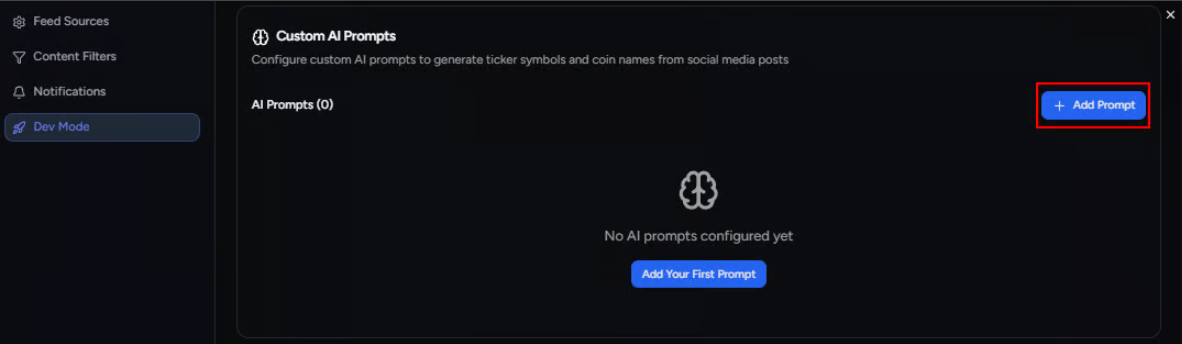
To do this, click on the Settings button and navigate to the Dev Mode settings. Under the Custom AI Prompts pane, click the Add Prompt button and enter what prompts you would like to pair token generations with. You can manage prompts at any time via this page.
## Custom AI Prompts:
To make using uDev even easier, you can set-up AI Prompts to assist in the creation of your coin's ticker/coin names. These prompts work via the [Star icon](/uDev#how-to-launch-coins-with-udev%3A) in the uDev Launch panel.
To do this, click on the Settings button and navigate to the Dev Mode settings. Under the Custom AI Prompts pane, click the Add Prompt button and enter what prompts you would like to pair token generations with. You can manage prompts at any time via this page.
 ## Launch Coins via Your Trading Platform:
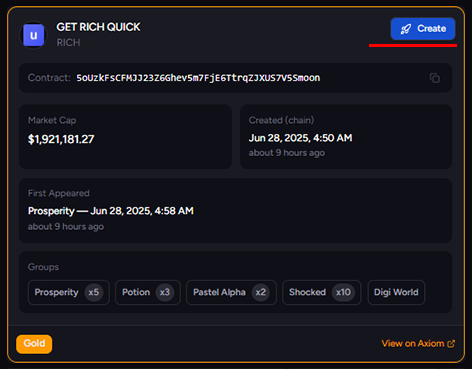
While using [uxtension](/uxtension) on your trading platform, you will also be able to employ uDev's launcher to easily launch coins without leaving your trading platforms. When using Axiom, Nova, GMGN or Photon you will find a new option to either 'Create Coin' or 'Vamp Coin'.
## Launch Coins via Your Trading Platform:
While using [uxtension](/uxtension) on your trading platform, you will also be able to employ uDev's launcher to easily launch coins without leaving your trading platforms. When using Axiom, Nova, GMGN or Photon you will find a new option to either 'Create Coin' or 'Vamp Coin'.
 Clicking both [Create Coin](/uDev#how-to-launch-coins-with-udev%3A) or [Vamp Coin](/uDev#vamp-coin%3A) will bring up the associated uDev Launch Panel. Just fill out the necessary fields and launch your coin.
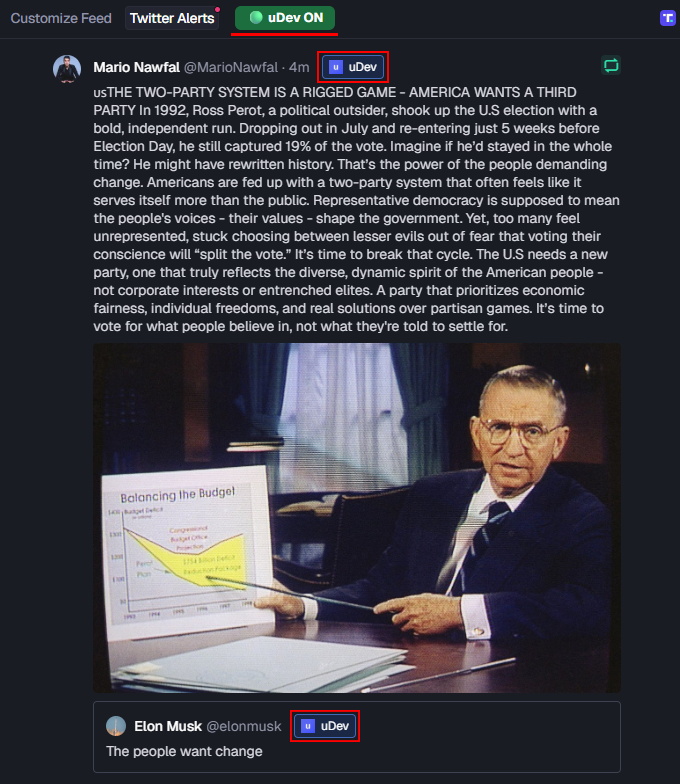
If your trading platform offers a X/CT Tracker (such as Axiom/Photon), you may use uDev to launch coins natively from posts received there.
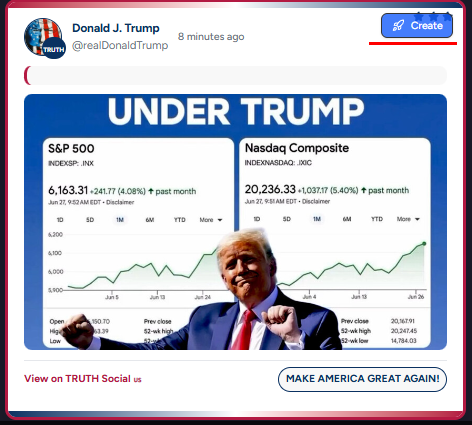
To do so, simply navigate to your Trading Platforms X Tracker, ensure the uDev button is turned on and then you will be able to create tokens straight from individual posts by clicking the uDev Launch button right next to the post author's X @ handle.
Clicking both [Create Coin](/uDev#how-to-launch-coins-with-udev%3A) or [Vamp Coin](/uDev#vamp-coin%3A) will bring up the associated uDev Launch Panel. Just fill out the necessary fields and launch your coin.
If your trading platform offers a X/CT Tracker (such as Axiom/Photon), you may use uDev to launch coins natively from posts received there.
To do so, simply navigate to your Trading Platforms X Tracker, ensure the uDev button is turned on and then you will be able to create tokens straight from individual posts by clicking the uDev Launch button right next to the post author's X @ handle.
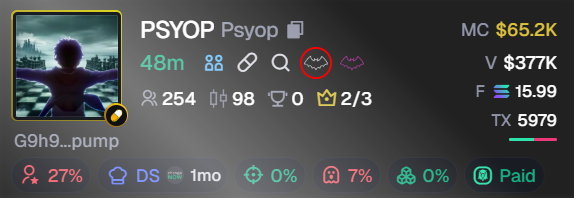
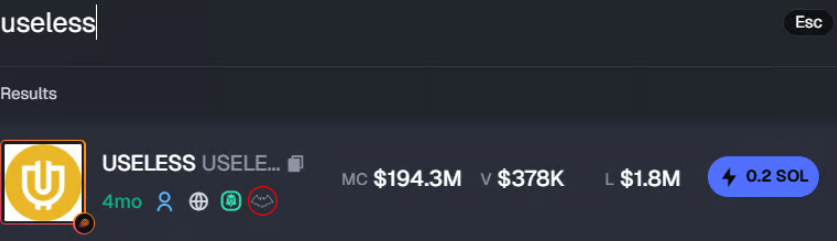
 You may also Vamp Coins directly from your Axiom Pulse cards. Simply click the 'Vamp' Button under the token info to be taken to the uDev Launcher.
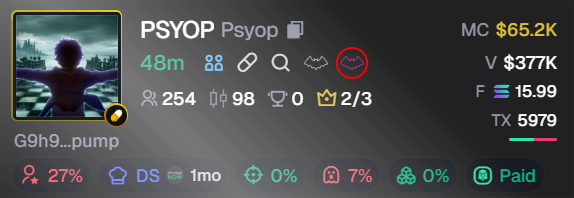
 You may also Insta Vamp coins directly from Axiom Pulse cards. Simply click the purple Bat icon under the token info to auto-deploy a token via uDev. [Click here to learn more.](/uxtension#vamp-coins-on-axiom-with-uxtension%3A)
 You may also quickly Vamp coins when searching on Axiom. When searching for any coin, simply hit the Vamp icon that appears in the search list to quickly vamp it.
 ## Launch Coins via X:
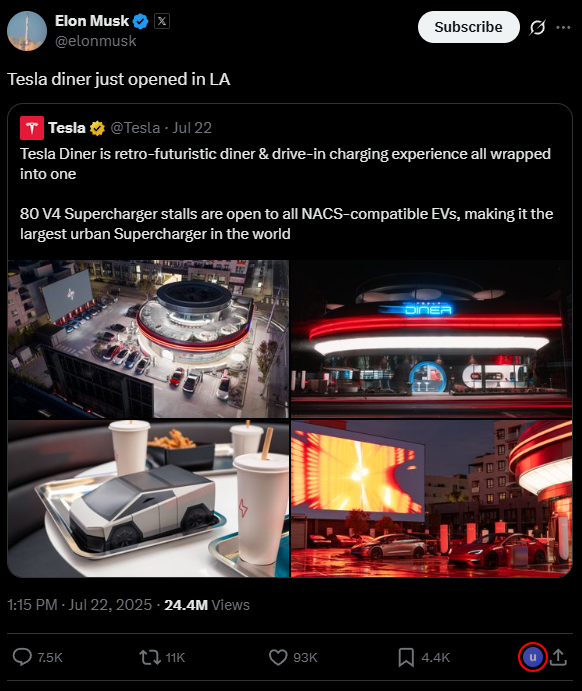
You can also launch coins directly while browsing X using uDev. Just click the 'u' button in the bottom left of any X post to open the uDev Launcher. From there, follow the prompts to seamlessly launch your coin through X.
For this to work you must be on the X post. - e.g. "x.com/elonmusk/status/xxxx
## Launch Coins via X:
You can also launch coins directly while browsing X using uDev. Just click the 'u' button in the bottom left of any X post to open the uDev Launcher. From there, follow the prompts to seamlessly launch your coin through X.
For this to work you must be on the X post. - e.g. "x.com/elonmusk/status/xxxx
 ## Launch Coins via Discord:
[You can also use uDev seamlessly within Discord, to learn more, click here.](/uxtension#discord-overlay-customization)
## Launch Coins Anywhere on the Web with uxtension:
You can also use uDev with its uxento companion, [uxtension](/uxtension) to launch/vamp coins from any page on the web. [To learn more, click here.](/uxtension#create-coins-via-uxtension)
## Buy/Sell with uDev:
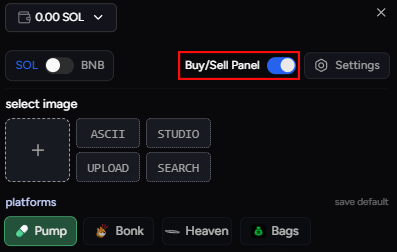
You may also use uDev to conduct your dev buy/sell trades with only a 0.75% fee (most platforms utilize a 1% fee) when creating your token. To do so ensure the Buy/Sell Panel toggle is enabled in your uDev Launch Panel.
## Launch Coins via Discord:
[You can also use uDev seamlessly within Discord, to learn more, click here.](/uxtension#discord-overlay-customization)
## Launch Coins Anywhere on the Web with uxtension:
You can also use uDev with its uxento companion, [uxtension](/uxtension) to launch/vamp coins from any page on the web. [To learn more, click here.](/uxtension#create-coins-via-uxtension)
## Buy/Sell with uDev:
You may also use uDev to conduct your dev buy/sell trades with only a 0.75% fee (most platforms utilize a 1% fee) when creating your token. To do so ensure the Buy/Sell Panel toggle is enabled in your uDev Launch Panel.
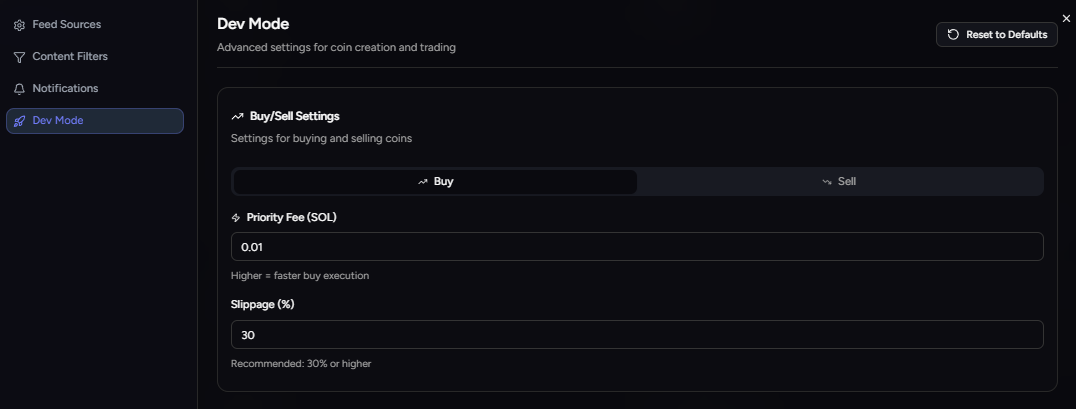
 You can adjust your buy/sell tips and slippage via the Dev Mode settings under the settings tab.
 ## Monitor uDev Assets:
You can easily view and manage tokens held within your uDev Wallets via the [uDev Sell Panel which can be accessed via Uxento Vision.](/uxento-vision#show-udev-sell-panel%3A)
## Monitor uDev Assets:
You can easily view and manage tokens held within your uDev Wallets via the [uDev Sell Panel which can be accessed via Uxento Vision.](/uxento-vision#show-udev-sell-panel%3A)
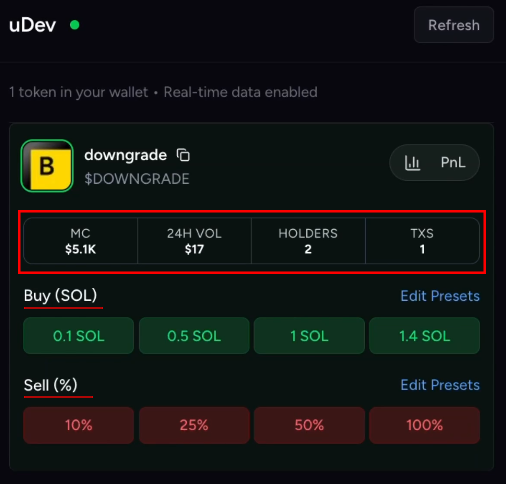 Within the uDev Sell Panel you may view all necessary token information as well as access Quick Sell buttons to quickly execute trades.
## Generate uDev PnL:
Within the Sell Panel you may also generate custom uDev PnL cards for tokens you've held or created. To do this, simply click the PnL button next to any currently held or previously traded position in your wallet.
Within the uDev Sell Panel you may view all necessary token information as well as access Quick Sell buttons to quickly execute trades.
## Generate uDev PnL:
Within the Sell Panel you may also generate custom uDev PnL cards for tokens you've held or created. To do this, simply click the PnL button next to any currently held or previously traded position in your wallet.
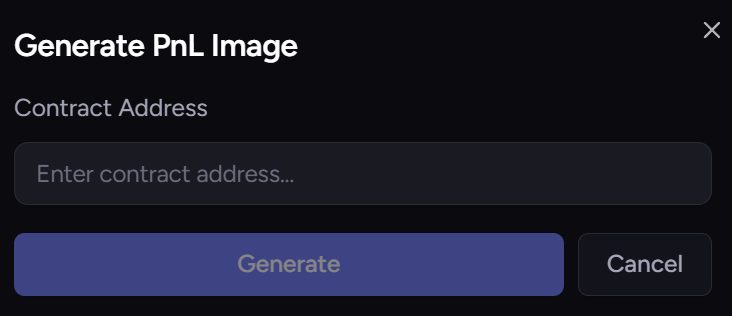
 You can also generate PNL cards by clicking the uPNL button in your buy/sell panel and entering the CA of any token you’ve held within your uDev Wallet.

 Additionally, you can also generate your PNL cards with custom backgrounds by clicking the **‘Custom’** above your generated PNL.
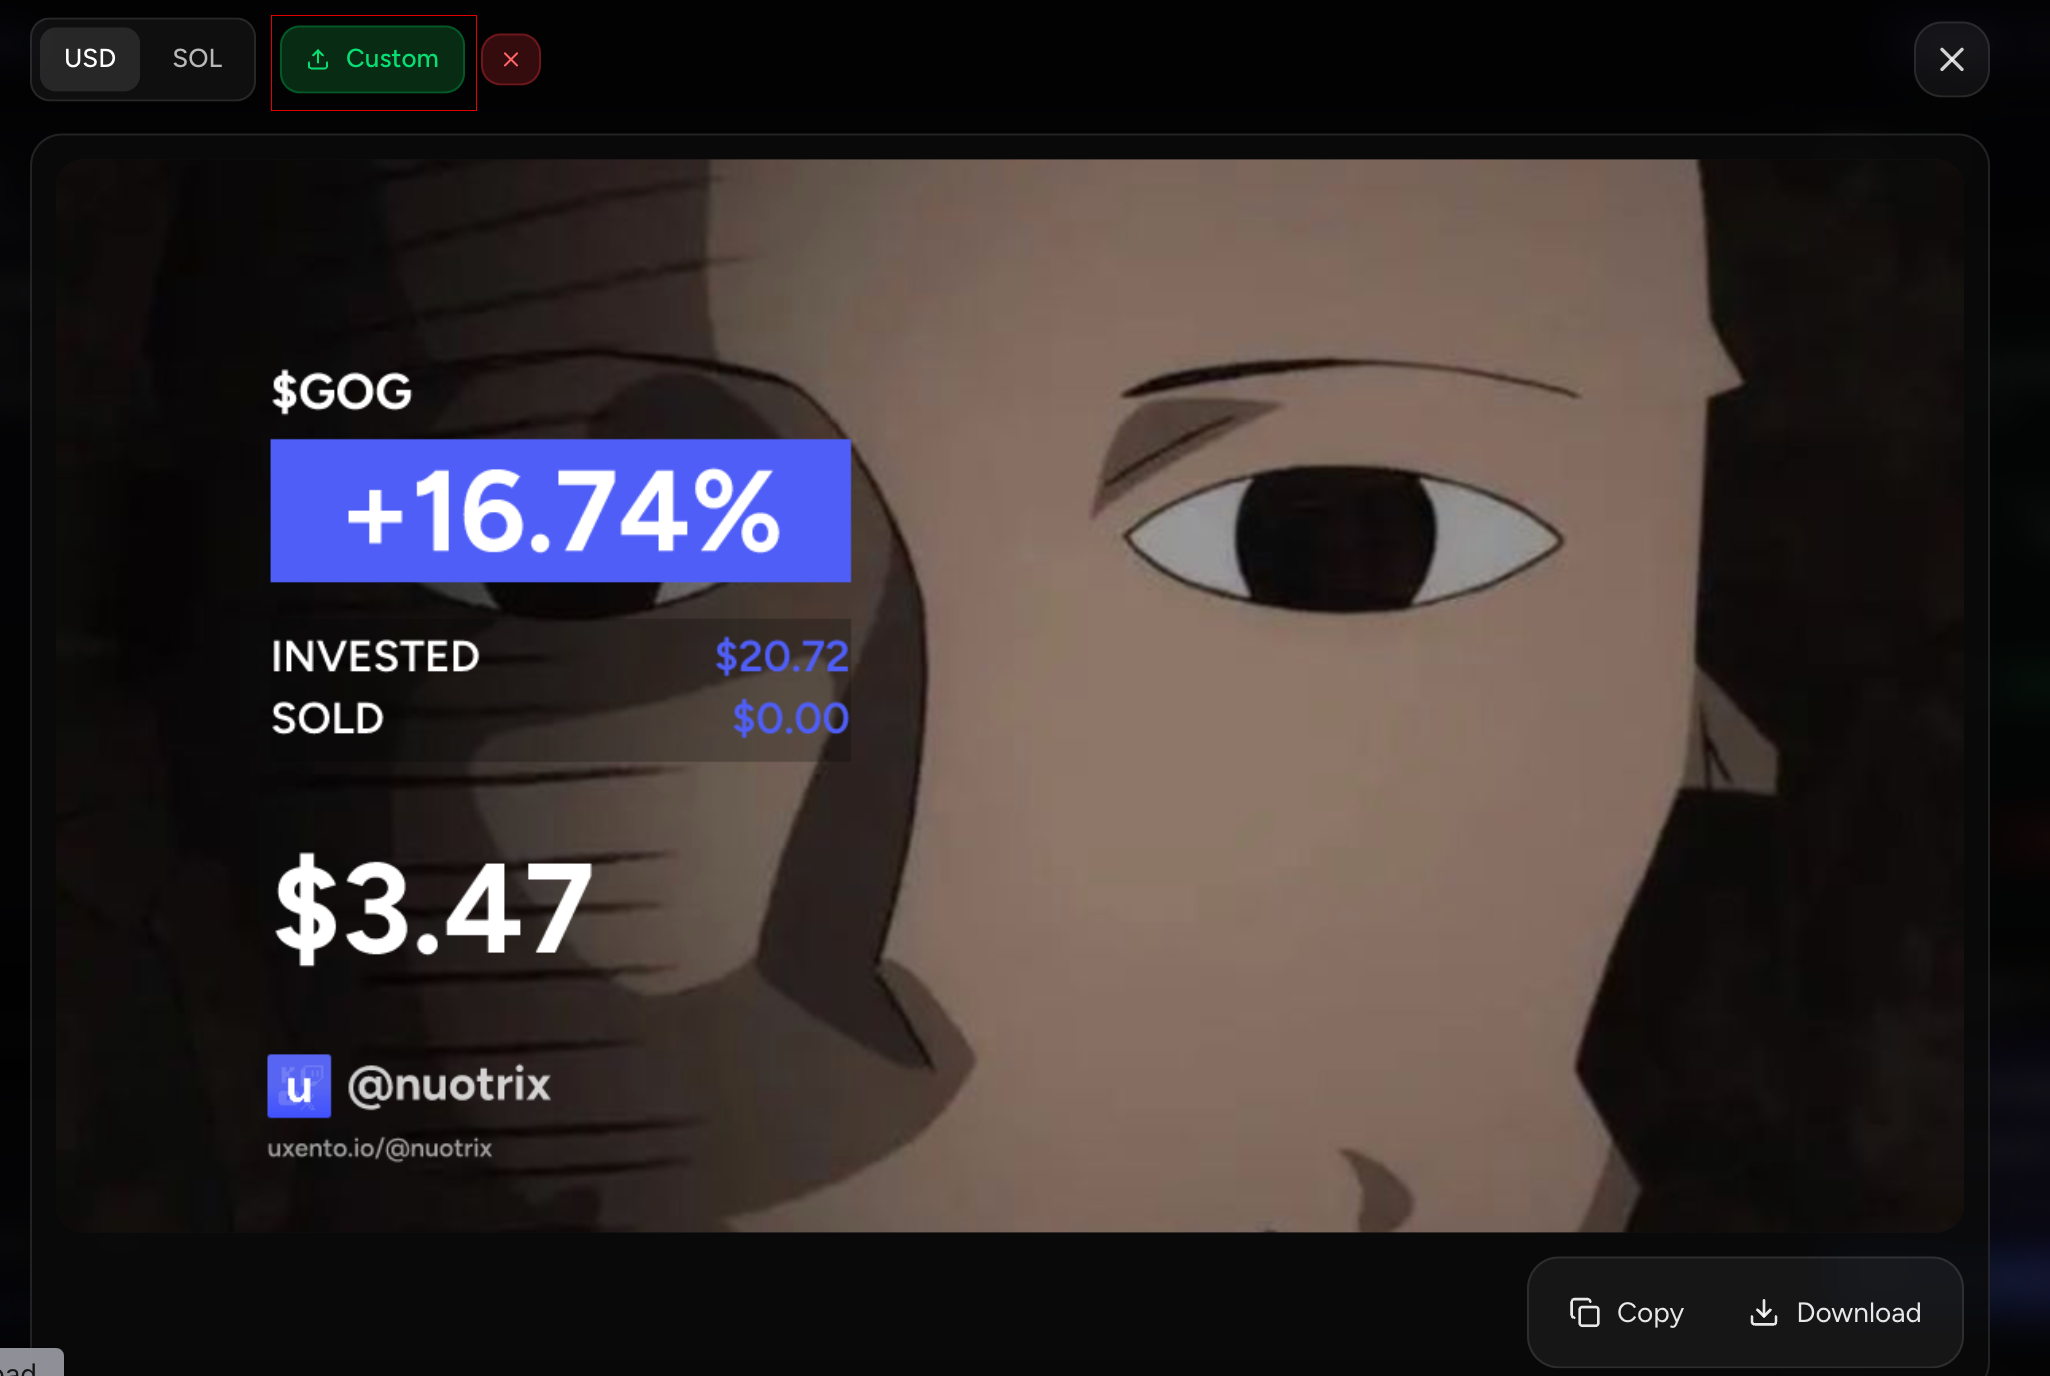 By clicking the USD/SOL toggle in the top left of your generated PnL card you can swap the displayed currency of your PnL!
## Custom uDev Priority Fees:
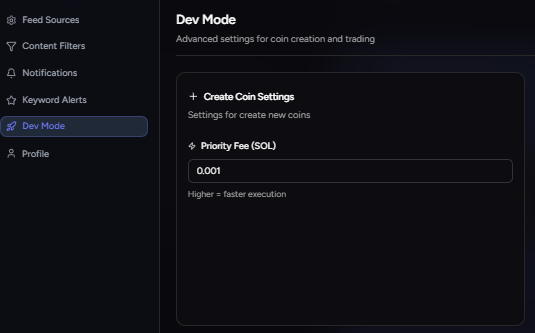
You may also customize your 'Create Coin' priority fee for faster execution. This can be done via the Dev Mode settings panel in Uxento Vision under the 'Create Coin Settings' pane, or the [Advanced Settings](/uDev#advanced-settings%3A) in your uDev Launch Panel. Simply change the fee higher or lower to suit your needs.
By clicking the USD/SOL toggle in the top left of your generated PnL card you can swap the displayed currency of your PnL!
## Custom uDev Priority Fees:
You may also customize your 'Create Coin' priority fee for faster execution. This can be done via the Dev Mode settings panel in Uxento Vision under the 'Create Coin Settings' pane, or the [Advanced Settings](/uDev#advanced-settings%3A) in your uDev Launch Panel. Simply change the fee higher or lower to suit your needs.
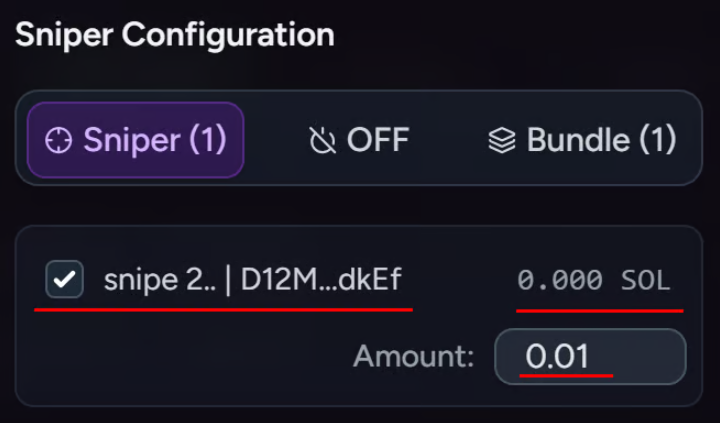
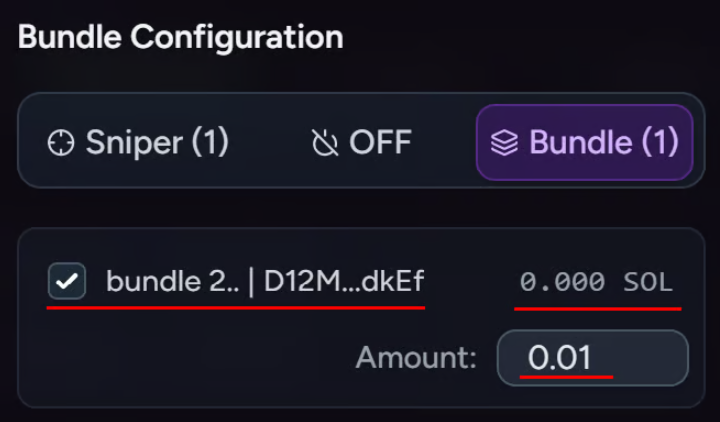
 ## Sniper/Bundler:
uxento also comes complete with a Sniper and Bundler for devs who use multiple wallets linked to uDev when launching coins.
This feature is currently only compatible with launches on pump.fun.
To configure this, simply click on the Snipe/Bundle Configuration Button to configure either tool.
## Sniper/Bundler:
uxento also comes complete with a Sniper and Bundler for devs who use multiple wallets linked to uDev when launching coins.
This feature is currently only compatible with launches on pump.fun.
To configure this, simply click on the Snipe/Bundle Configuration Button to configure either tool.
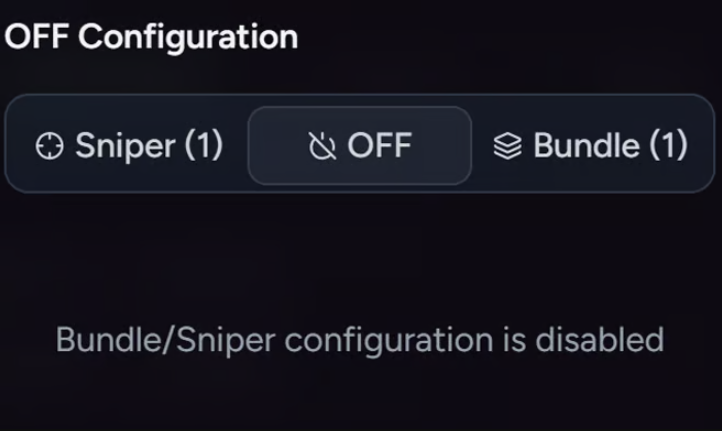
 Within the configuration settings you may select which wallets you wish to use to Snipe/Bundle with as well as customize the SOL amount that wallet will us when executing transactions.
While active, the Configuration icon in your uDev Launch Panel will be highlighted, displaying the active tool and how many wallets are configured to be used.
Within the configuration settings you may select which wallets you wish to use to Snipe/Bundle with as well as customize the SOL amount that wallet will us when executing transactions.
While active, the Configuration icon in your uDev Launch Panel will be highlighted, displaying the active tool and how many wallets are configured to be used.
 ## Multi-Deploy Tokens:
When launching coins, you may easily deploy multiple of the same token. To do this, simply click on the Blocks icon in the top right of your uDev Launch Panel.
## Multi-Deploy Tokens:
When launching coins, you may easily deploy multiple of the same token. To do this, simply click on the Blocks icon in the top right of your uDev Launch Panel.
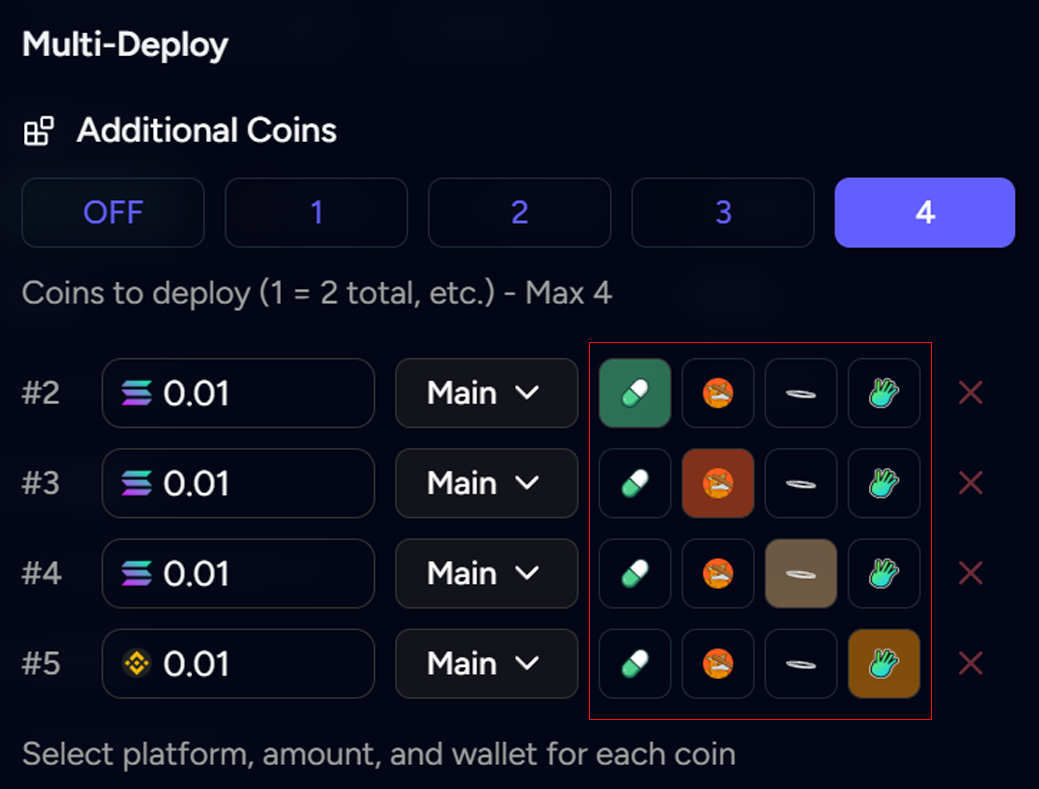
 Once you are in the Multi-Deploy settings you may set how many additional coins you wish to deploy (up to four), and the amounts for each multi-coin.
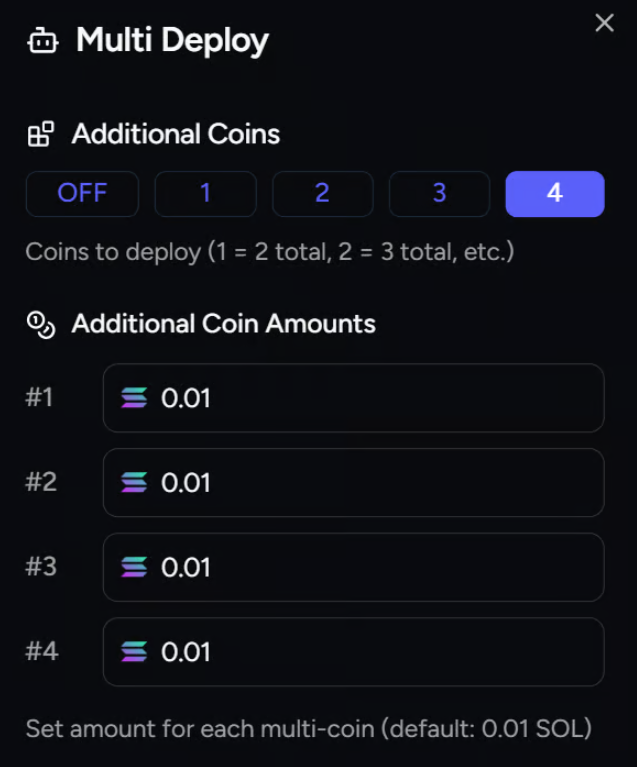 While active, the Multi-Deploy icon in your uDev Launch Panel will be highlighted, displaying the number of additional coins you wish to deploy.
 #### Cross-Deploy:
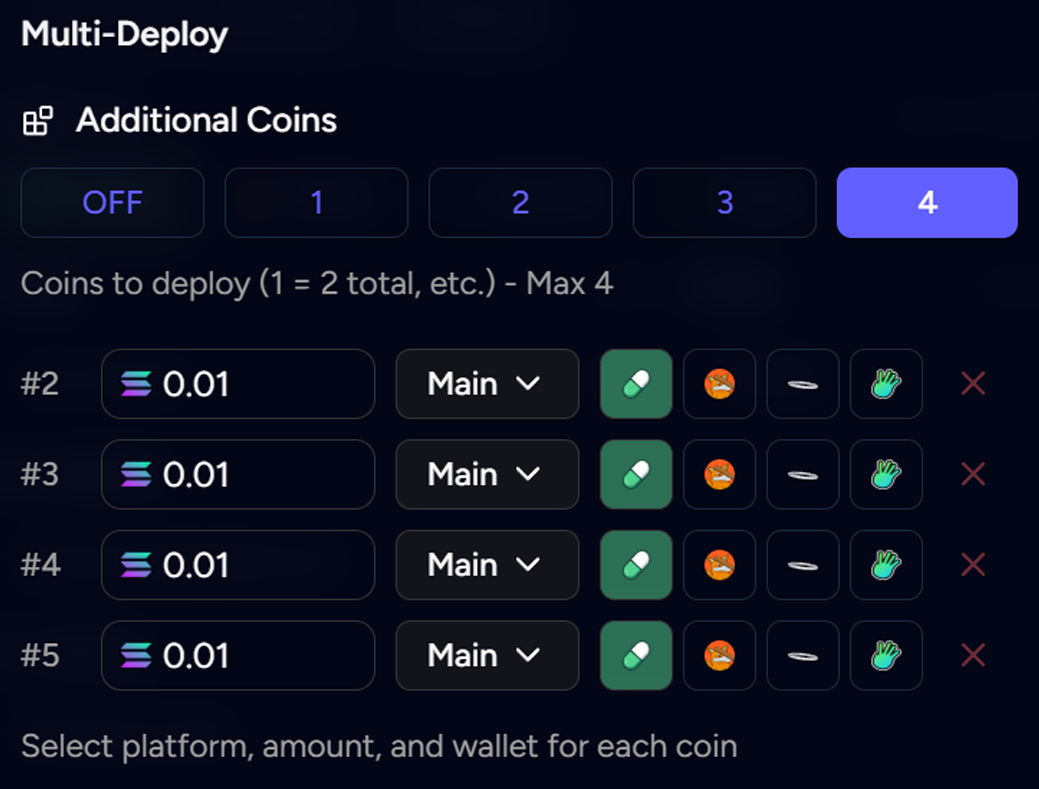
Additionally, you may also launch multiple coins simultaneously across different launchpads. When refining your Multi-Deploy settings, you will also see an option to launch via another platform - simply select which platforms you wish to launch with.
#### Cross-Deploy:
Additionally, you may also launch multiple coins simultaneously across different launchpads. When refining your Multi-Deploy settings, you will also see an option to launch via another platform - simply select which platforms you wish to launch with.
 #### Multi-Dev:
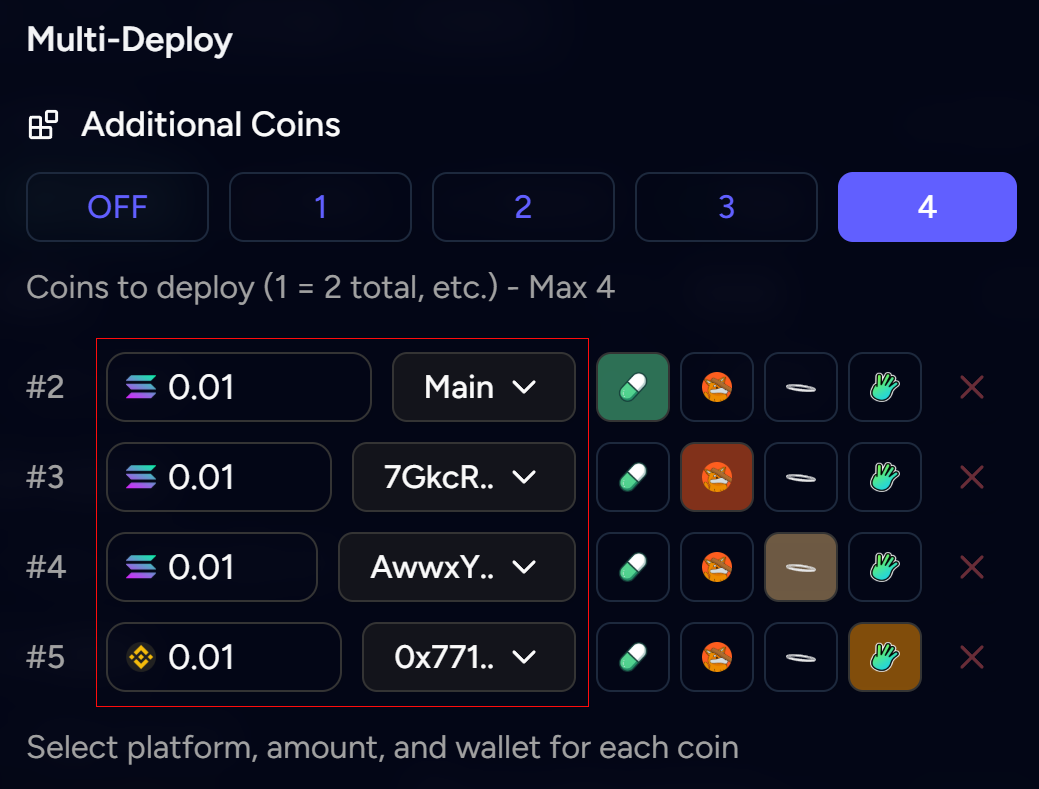
In addition to the above, Multi-Dev allows you to launch duplicate tokens from **multiple wallets**.
To do this, when refining your multi-deploy settings, click the drop-down next to the platform selector and choose the wallet you want to use to launch each token.
You can add, import or manage wallets at anytime via the Dev Mode Panel in your Dev Settings.
#### Multi-Dev:
In addition to the above, Multi-Dev allows you to launch duplicate tokens from **multiple wallets**.
To do this, when refining your multi-deploy settings, click the drop-down next to the platform selector and choose the wallet you want to use to launch each token.
You can add, import or manage wallets at anytime via the Dev Mode Panel in your Dev Settings.
 ## Auto-Sell:
uDev also has a built-in feature toAuto-Sell when deploying coins. To do this, simply click the Robot icon in the top right of your uDev Launch Panel.
## Auto-Sell:
uDev also has a built-in feature toAuto-Sell when deploying coins. To do this, simply click the Robot icon in the top right of your uDev Launch Panel.
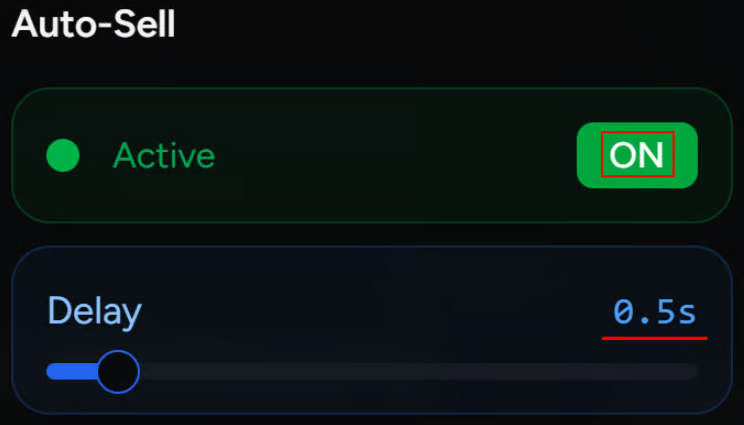
 Once you are in the Farm Snipers Settings you may toggle the feature on/off, as well as edit the Sell Delay Configuration. **Smaller number = less delay.**
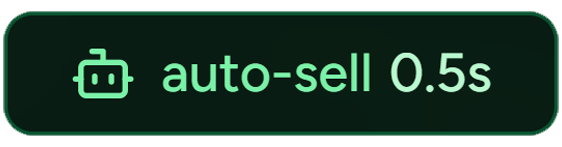
 While active, the Farm Snipers icon in your uDev Launch Panel will be highlighted, displaying the Sell Delay Configuration in milliseconds.
 ## Launch Coins with USD1:
When using uDev to launch coins via [Bonk](/udev#how-to-launch-coins-with-udev%3A) - you may also use USD1 instead of Solana to deploy your token. To do this, simply click the currency toggle from SOL to USD1.
## Launch Coins with USD1:
When using uDev to launch coins via [Bonk](/udev#how-to-launch-coins-with-udev%3A) - you may also use USD1 instead of Solana to deploy your token. To do this, simply click the currency toggle from SOL to USD1.
 ## Advanced Settings:
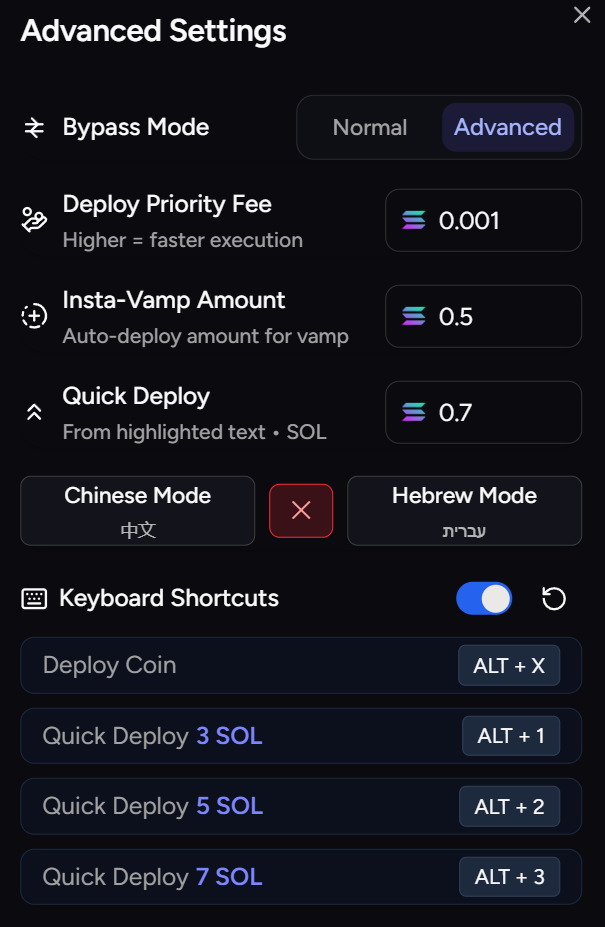
Within the uDev Creator Module, you can access a range of advanced settings to further fine tune your launch experience via uDev.
**These settings include:**
**Bypass Mode:**
## Advanced Settings:
Within the uDev Creator Module, you can access a range of advanced settings to further fine tune your launch experience via uDev.
**These settings include:**
**Bypass Mode:**
Toggle to **'Advanced'** to limit automated detection of tokens created with uDev and reduce attribution to uDev.
**Normal:** Can still manually be detected as a launch with uDev, but rarely.
**Advanced:** Impossible to detect; completely shadows your launch having any association with uDev.
**Deploy Priority Fee:**
[Quickly change your priority fee when deploying coins. Higher = faster execution.](/uDev#quick-deploy)
**Quick Deploy Preset:**
[Quickly change your preset amount of SOL when quick deploying tokens from highlighted text.](/uxtension#insta-vamp-on-pulse)
**Insta-Vamp Amount:**
Configure your preset for Auto-Deploys when Vamping Coins
**Keyboard Shortcuts:**
Easily create and customize quick keyboard shortcuts for a range of quick actions i.e. Deploy Coin or Quick Deploy 3 SOL.
**Vamp Mode Preset:**
Set your Vamp Mode Style Preset between Normal/Chinese/Hebrew for more efficient launches using Vamp Mode.
 ## Manage Developer Wallets in uDev:
While you only need to use uDev with the wallet provided to you, you also have the option to create, import and manage multiple wallets across chains. To do this, simply navigate to the Settings button and go to the **Dev Mode** panel.
Once in the Dev Mode settings you will find the wallet management tab at the top.
## Manage Developer Wallets in uDev:
While you only need to use uDev with the wallet provided to you, you also have the option to create, import and manage multiple wallets across chains. To do this, simply navigate to the Settings button and go to the **Dev Mode** panel.
Once in the Dev Mode settings you will find the wallet management tab at the top.
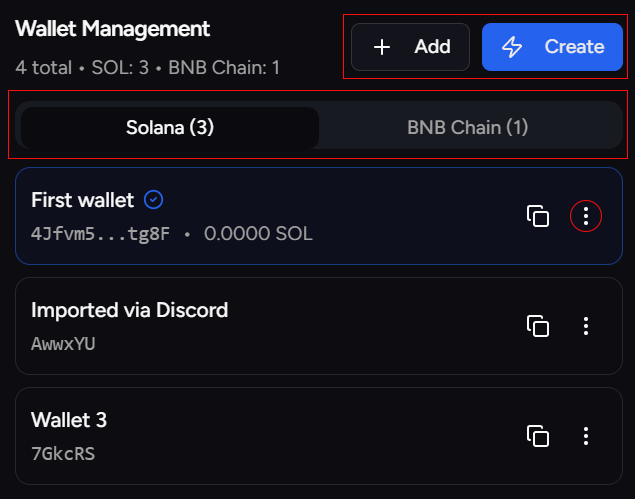 Within this tab you can manage all wallets associated with your uDev profile, create/import wallets, delete wallets and adjust your preferred primary wallet.
You can also see an overview of your main wallet and its balance at the bottom of the of the page.
Within this tab you can manage all wallets associated with your uDev profile, create/import wallets, delete wallets and adjust your preferred primary wallet.
You can also see an overview of your main wallet and its balance at the bottom of the of the page.
 #### Manage uDev Wallets Via Discord:
You may also manage your wallets via Discord, if you are a member of the [Uxento Discord Server.](https://discord.gg/uxento)
Within Uxento's Discord Server, there is a dedicated 'uDev' channel which you can use to interface with your wallet manager and send uDev related slash commands.
#### Manage uDev Wallets Via Discord:
You may also manage your wallets via Discord, if you are a member of the [Uxento Discord Server.](https://discord.gg/uxento)
Within Uxento's Discord Server, there is a dedicated 'uDev' channel which you can use to interface with your wallet manager and send uDev related slash commands.

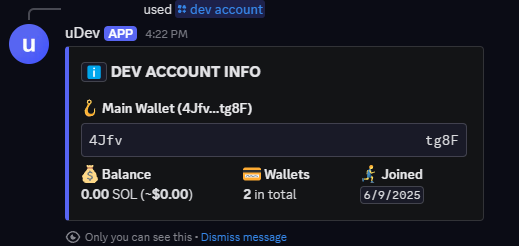
 `/dev account`
The `/dev account` command allows you to see a display of your Dev account including the balance and public key of your primary wallet and how many wallets you have in your Dev account.
`/dev account`
The `/dev account` command allows you to see a display of your Dev account including the balance and public key of your primary wallet and how many wallets you have in your Dev account.
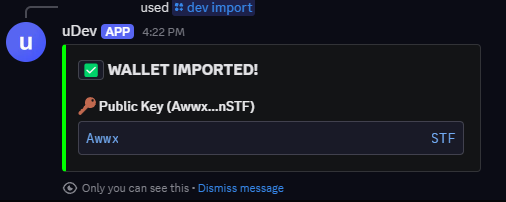
 `/dev import`
The `/dev import` command allows you to import any Solana wallet you wish to use with uDev, simply enter the private key of the wallet you wish to import.
`/dev import`
The `/dev import` command allows you to import any Solana wallet you wish to use with uDev, simply enter the private key of the wallet you wish to import.

 `/dev wallets`
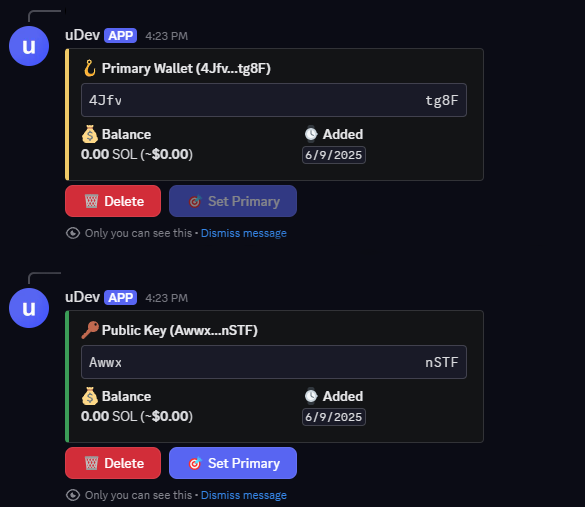
The `/dev wallets` command allows you to manage all of your uDev wallets via an interface where you can delete wallets, and set a new primary wallet by using the embedded buttons.
`/dev wallets`
The `/dev wallets` command allows you to manage all of your uDev wallets via an interface where you can delete wallets, and set a new primary wallet by using the embedded buttons.